Navigating the digital realm becomes a seamless experience for individuals with cognitive disabilities through the innovative Assistive Access feature on iOS. This transformative tool optimizes essential apps, magnifies onscreen elements, and refines navigation, fostering independence and accessibility. In this guide, we delve into the meticulous process of setting up Assistive Access on your iPhone, ensuring a tailored and empowering user experience.
Preliminary Steps
Before learning the steps for setting up Assistive Access, consider enlisting the support of a trusted ally, such as a family member or caregiver. Their familiarity with the user’s preferences and the necessary account information, like the Apple ID, proves invaluable. For new iPhones, follow the device setup guidelines outlined in the Apple Support article, “Set up your iPhone or iPad.” Additionally, confirm that your iPhone operates on iOS 17 or later by referring to the “Update iOS” section in the iPhone User Guide.
Initiating Assistive Access Setup
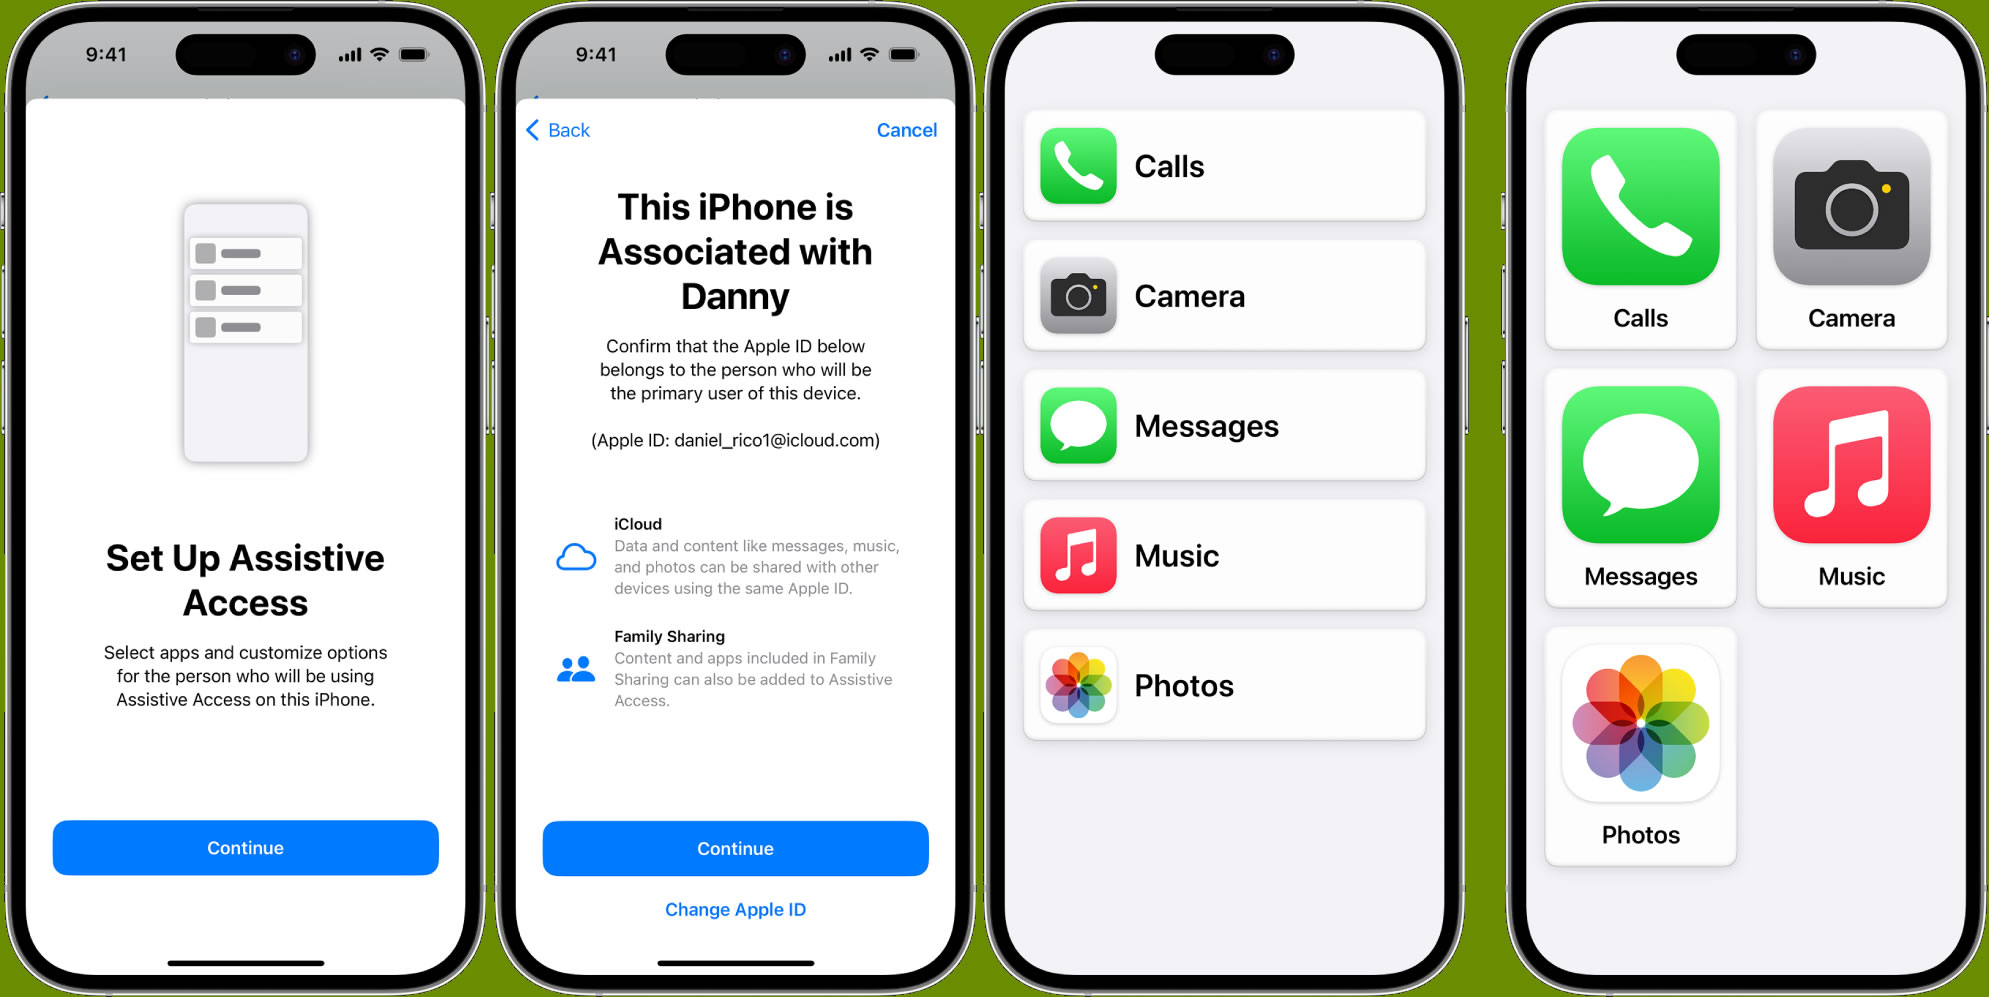
- Locate Assistive Access in Settings: Open your iPhone Settings, navigate to Accessibility, and then tap on Assistive Access. Initiate the setup by tapping “Set Up Assistive Access” and subsequently selecting “Continue.”
- Verification of Apple ID Ensure: The displayed Apple ID belongs to the intended user. If incorrect, tap “Change Apple ID,” sign out of the displayed ID, and sign in with the appropriate credentials. For users without an Apple ID, you can create one following the provided guidelines.
Customizing App Layouts
- Choosing App Layouts: Tailor the layout for apps on the Home Screen and within Assistive Access-optimized apps. Opt for a straightforward list format or a visually emphasized grid arrangement.
- Adding and Customizing Apps: Personalize the apps available in Assistive Access by tapping the “Add” button. This step allows you to include both Assistive Access-optimized apps and other iOS applications. The flexibility to modify this selection at any time ensures a dynamic user experience. Important: Be mindful of variations in-app access permissions and privacy features within Assistive Access.
Security and Accessibility Integration
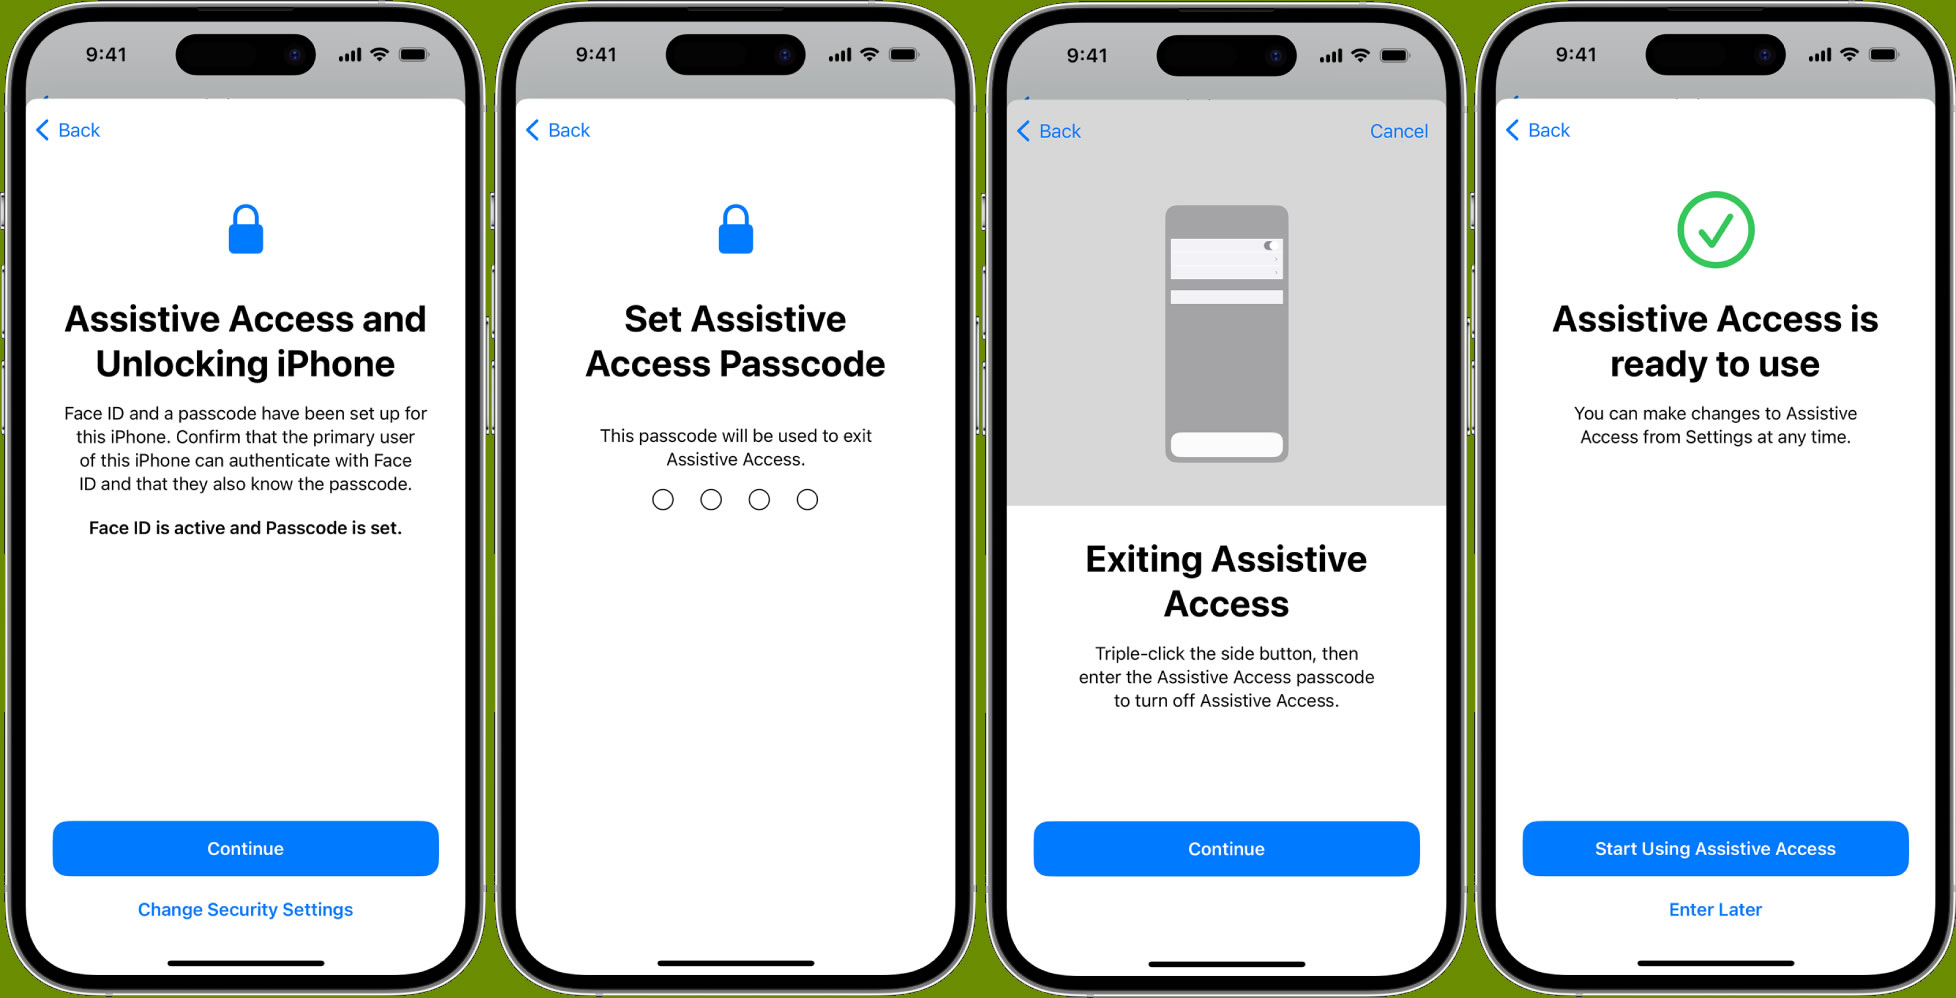
- Device Passcode Verification: Confirm the user’s awareness of the device passcode. Optionally, set up Face ID or Touch ID for a more personalized unlocking experience. Adjust security settings if needed by tapping “Change Security Settings.”
- Setting the Assistive Access Passcode: Establish the Assistive Access passcode, a crucial element for entering or exiting Assistive Access. For future passcode retrieval or resetting, linking an Apple ID is recommended.
Mastering Assistive Access
- Learning to Exit Assistive Access: Familiarize yourself with the effortless exit process. Triple-click the side button (on Face ID iPhones) or the Home button (on other iPhone models), and input the Assistive Access passcode.
- Commencing the Assistive Access Journey: Embrace the newfound independence by tapping “Start Using Assistive Access.” For subsequent entries, access Assistive Access via Settings, tapping “Start Assistive Access,” and entering the passcode.
Final Thoughts
Assistive Access enables tailoring your iPhone experience to match your unique needs and preferences. Additionally, thoughtful customization options and robust security features pave the way for accessibility. It’s not merely a tool but a gateway to unlocking independence in the digital realm. Moreover, it transforms the iOS experience into something user-centric and accessible. Therefore, as you embark on this transformative journey with Assistive Access, align your iPhone to your needs. Consequently, embrace its potential to foster independence in the digital world.
Expand Your Knowledge:
 How to Access Siri on iPhone
How to Access Photo Stream on iPhone
How to Access Siri on iPhone
How to Access Photo Stream on iPhone
 Apple Enhances User Experience with Extended Free Access to Emergency SOS Feature on iPhone 14
Access and Security Options for Your iPad and iPhone
Apple Enhances User Experience with Extended Free Access to Emergency SOS Feature on iPhone 14
Access and Security Options for Your iPad and iPhone
 iOS 17.2 Spotlight: Streamlining App Access in the App Store
 How to Resolve iPhone Startup Issues
 How to Stop Push Notifications on iPhone
 How to Transfer Photos from iPhone to Mac Without iCloud
 How to Preserve iPhone Battery Health: Essential Tips You Must Know
 Enhancing Mental Wellbeing: How to Log Your State of Mind on iPhone