In our tech-driven world, where seamless integration is the norm, utilizing iCloud for syncing photos across Apple devices is common. However, not everyone is well-versed in the art of transferring photos from an iPhone to a Mac without the aid of iCloud. In this comprehensive guide, we will delve into the meticulous steps required to achieve this, demonstrating an alternative method that doesn’t involve cloud services.
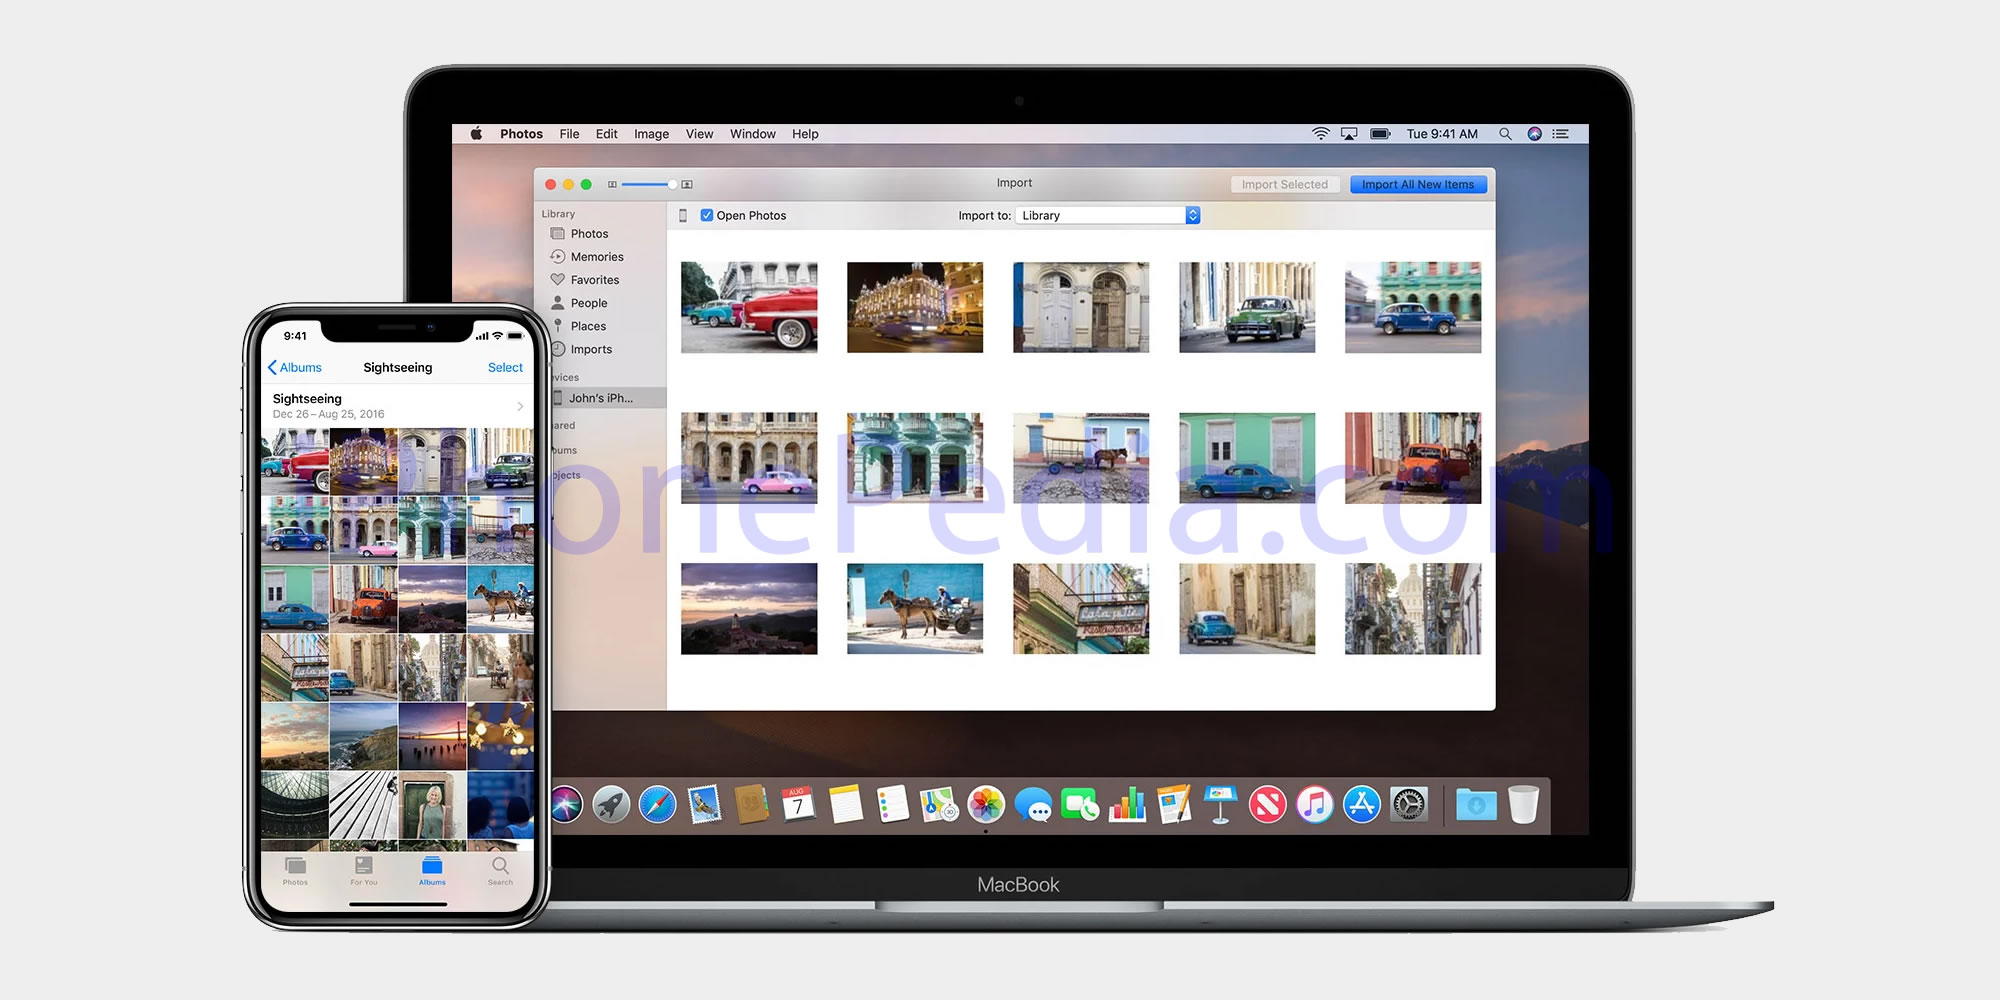
Image Capture Application Method
When steering away from the iCloud route, the Image Capture application emerges as a reliable ally. Follow these steps to gracefully transport your cherished photos from your iPhone to your Mac:
- Establish the Physical Connection: Connect your iPhone to your Mac using a USB cable. This establishes a direct link between the two devices.
- Grant Access: A prompt will appear, requesting permission to access your iPhone via USB. Ensure a smooth process by selecting “Allow.”
- Navigate to Image Capture: Launch the “Image Capture” application, located in the /Applications folder. Alternatively, use the Spotlight search by pressing Command+Spacebar, type “Image Capture,” and hit return.
- Device Selection: In Image Capture, choose your iPhone from the left-side menu. This sets the stage for the impending photo transfer.
- Destination Customization: Optionally, tailor the destination for your photos on your Mac. Click the ‘Import to’ dropdown menu to choose a specific location or stick with the default Pictures folder.
- For a comprehensive transfer of all photos, click the “Download All” button in the bottom right corner.
- To be selective in your transfer, choose individual photos and click “Download” in the bottom right corner.
- Completion and Verification: Allow the transfer process to unfold. Once completed, your pictures will reside in the designated folder, typically the user’s Pictures directory.
How to Transfer Photos to MAC with the Import Method
The process of importing photos and videos from your iPhone or iPad to your Mac is a seamless and efficient way to preserve your cherished memories. Whether you’re transferring a collection of photos or lengthy videos, the USB file transfer method ensures commendable speed. However, the duration of the transfer may vary based on factors such as the quantity of photos or the length of videos being transferred. Patience is key as you witness your memories seamlessly shift from your iPhone to your Mac.
To import your photos and videos to your Mac, follow these simple steps:
- Connect your iPhone or iPad to your Mac using a USB cable.
- Open the Photos app on your computer.
- The Photos app will automatically display an Import screen containing all the photos and videos on your connected device. If the Import screen doesn’t appear, click on the device’s name in the Photos sidebar.
- If prompted, unlock your iOS or iPadOS device using your passcode. If you see a Trust This Computer prompt on your device, tap Trust to proceed.
- Choose the destination for your imported photos. Next to “Import to,” you can either select an existing album or create a new one.
- Select the specific photos you wish to import, then click either “Import Selected” or “Import All New Photos.”
- Allow the process to complete, and once finished, safely disconnect your device from your Mac.

Whether you have a multitude of memories to transfer or just a few, this import method provides a straightforward way to organize and safeguard your photos and videos on your Mac. If you are using iCloud Photos, remember that there’s no need to import manually, as your photos are seamlessly synced across your devices.
Beyond Image Capture: Exploring Alternative Avenues
While Image Capture stands out as a straightforward and efficient method, there are alternative routes worth exploring:
1. Photos App: The native Photos app, whether iCloud Photos is enabled or not, proves versatile in managing photos. Its intuitive interface offers a user-friendly experience.
2. Preview App: Don’t overlook the Preview app, another native gem on your Mac. It’s not just for viewing images; it can also serve as a conduit for transferring them.
3. Third-Party Apps: In the vast realm of third-party applications, numerous tools specialize in facilitating seamless photo transfers. Explore these options based on your preferences and specific needs.
The Bottom Line
While iCloud offers a streamlined photo-syncing experience, mastering the art of transferring photos without it opens a realm of possibilities. Image Capture, with its simplicity, stands tall as a go-to solution. However, the Photos app, Preview, and third-party apps provide versatile alternatives, allowing users to tailor their photo transfer experience to their liking.
Expand Your Knowledge:
 How to Autofill SMS Passcodes & Security Codes on iPhone, iPad and Mac
 Apple Mac Neo Rumor Points to a $300 Budget Mac Shake-Up
 How to Transfer Your Contacts from an Android Phone to an iPhone
 How to Enable or Disable iCloud on iPhone
 Resolving the “This iPhone is Open in Another Window” Error in Mac Music
 How to stop iOS from sending more iCloud promotion messages on your iPhone or iPad
 How to Take Live Photos on iPhone 6s
 How to Recover Deleted Photos on iPhone
 How to Send HD Photos on WhatsApp for iPhone